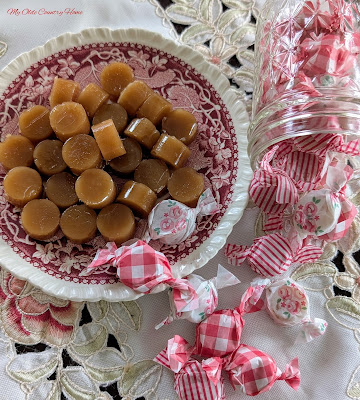
Butterscotch Hard Candies
This month I made some beautiful Butterscotch Candies from scratch. Butterscotch is my favorite hard candy. These taste even better than the famous yellow disk candies from Brach's®. This recipe makes a lot so you will be in business for a while. The great thing about these is that there is no artificial coloring. Make some for yourself or as a gift for a friend.
This is the LorAnn® butterscotch flavoring I use. You can find it at your local crafts stores or online. I order it from Amazon®.
Here is the silicone candy mold I use. The cavities are .78" wide and .43" deep. I got them from Amazon®.
Printed waxed wrapping papers are available online from Amazon® and other sellers.
Butterscotch Hard Candies
Ingredients
2 cups white granulated sugar
1/2 cup brown sugar
3/4 cup water
2/3 cup light corn syrup
1/2 cup butter (1 stick cut into 8 pieces)
1/2 teaspoon fine sea salt
1 teaspoon of LorAnn® butterscotch flavor
Instructions
1. Bring to a boil on medium heat the sugars, water and light corn syrup. Once it reaches a steady rolling boil step back and let it go for 22 minutes. Do not stir. Just set the timer and walk away.
On my stove, I was able to keep the burner setting on 3 and it continued a nice steady rolling boil on its own. All stoves are different so be sure it's not too hot. You just want it to boil steady but not overflow the pot.
2. Meanwhile prepare your butter and cut it into the 8 cubes, get the salt ready and the butterscotch flavor so it's ready to add to the pot after the 22 minutes is up.
3. Also take this time to prepare your candy molds.
If you don't have candy molds it is okay. Just place a sheet of parchment paper over a jelly roll pan / cookie sheet. When the candy is done cooking you may pour it over the parchment paper and let it sit until hard and break it into pieces.
4. Once the candy has cooked for 22 minutes add in the butter and salt. Let it slowly boil for another 10 minutes, stirring often.
5. At the end of the 10 minutes pour some cold water into a cup then using a spoon scoop some of the hot candy out and pour it into the cold water. This is how to tell if your candy has reached the hard crack stage. If the candy is hard when you take it out of the water you know it's done. Or you may use a candy thermometer. If it reads 300 to 310 degrees it's ready.
6. Once your candy has reached the correct temperature, pour in the 1 teaspoon of butterscotch flavor. Stir to combine. Do this step slowly as it will want to bubble up on you.
7. If you are using the molds you have to work quickly. I used two spoons to drop the melted candy into the molds. This candy recipe is too thick to use a dropper.
If instead, you pour the candy over the mold to fill the cavities, you will have to break them all apart as the extra candy will end up hardening between all the cavities. They won't come out nice and neat that way.
If you are going to pour it out onto parchment paper do that now.
This candy will harden quickly. As soon as it's hard you may enjoy!
8. If you like, you may wrap each piece in waxed paper. I like to keep pretty waxed papers around for such things. It's perfect if you want to make this candy as a gift.
Store the candies in an airtight container for up to 2 weeks.
Makes about sixty 3/4-inch disk candies.
Enjoy!!!
~ Dana
Printable Recipe Pages
copyright 2025, Dana Meier, My Olde Country Home
Dana Meier is a caterer, cookbook author, online content creator and purveyor of historic crafts in Washington state. Her first cookbook was published in 2023.
My Olde Country Home cookbook series:
Vol. 1 - Olde Fashioned Christmas Desserts
Vol. 2 - Vintage Cookie Recipes
available on Amazon®


Comments
Post a Comment